


It is a fact of life: some men have no trouble finding clothes that fit like a glove. For others, it is quite another story. However, there is no need to give up! For a shirt, for instance, many areas can be altered: taking in the waist, adjusting the collar size, or shortening a sleeve... The frustration of not fitting standard off-the-rack sizes can, in the end, be a great opportunity to get to know and care for our wardrobe better, by trying your hand at sewing.
Shortening the sleeves of a shirt is a relatively straightforward task that makes for a great first project. And if needlework is not your thing, take the time to browse our size guide before buying a shirt from Hast.
What could be more frustrating than a well-cut garment that does not suit your build?
While shortening the sleeves of a long-sleeved shirt is not an insurmountable challenge for a novice, it does require a touch of technique and patience. Why? Because unlike short sleeves, long sleeves do not have the same circumference all the way down. They taper towards the cuff to keep the sleeve from slipping down the arm. But that is the only real hurdle.
1. Begin by unpicking the cuff using a seam ripper. If the sleeve features a placket, you will also need to undo its stitching. Work on one sleeve at a time, so you keep a reference model handy in case of doubt. Before taking any measurements, give all the pieces a good press with an iron to ensure maximum precision.

2. To ensure the best result, it is best to try the garment on before shortening the sleeves of the shirt. Pin the cuff to the desired length, put the shirt on, and bend your arm slightly to leave some ease. Mark the line with tailor's chalk or a pencil.

3. Carefully cut the sleeve, and, if needed, extend the placket slit using the original placket as a template. Leave a seam allowance of just over one centimetre for the hem.
.jpg)
4. You have almost finished shortening the sleeve of the shirt. Now it is time to sew everything back together, starting with the placket. Use the other sleeve as a guide to ensure all parts are stitched back in the right place.
.jpg)
5. It is now time to reattach the cuff to the sleeve. Insert the edge of the sleeve between the cuff layers and stitch them together. Before finishing the topstitching, do not forget to recreate the two sleeve pleats, using the original pleat lines as a guide.

And there you have it: you now have an (almost) bespoke shirt.
Choosing the right shirt size
If you would rather avoid taking out the sewing machine, learning your exact measurements will help you order the right fit straight away.
You might still need to shorten the sleeves of your shirt, but at least you will avoid any unpleasant surprises.
To minimise the risk when choosing your size, opt for the classic fit.
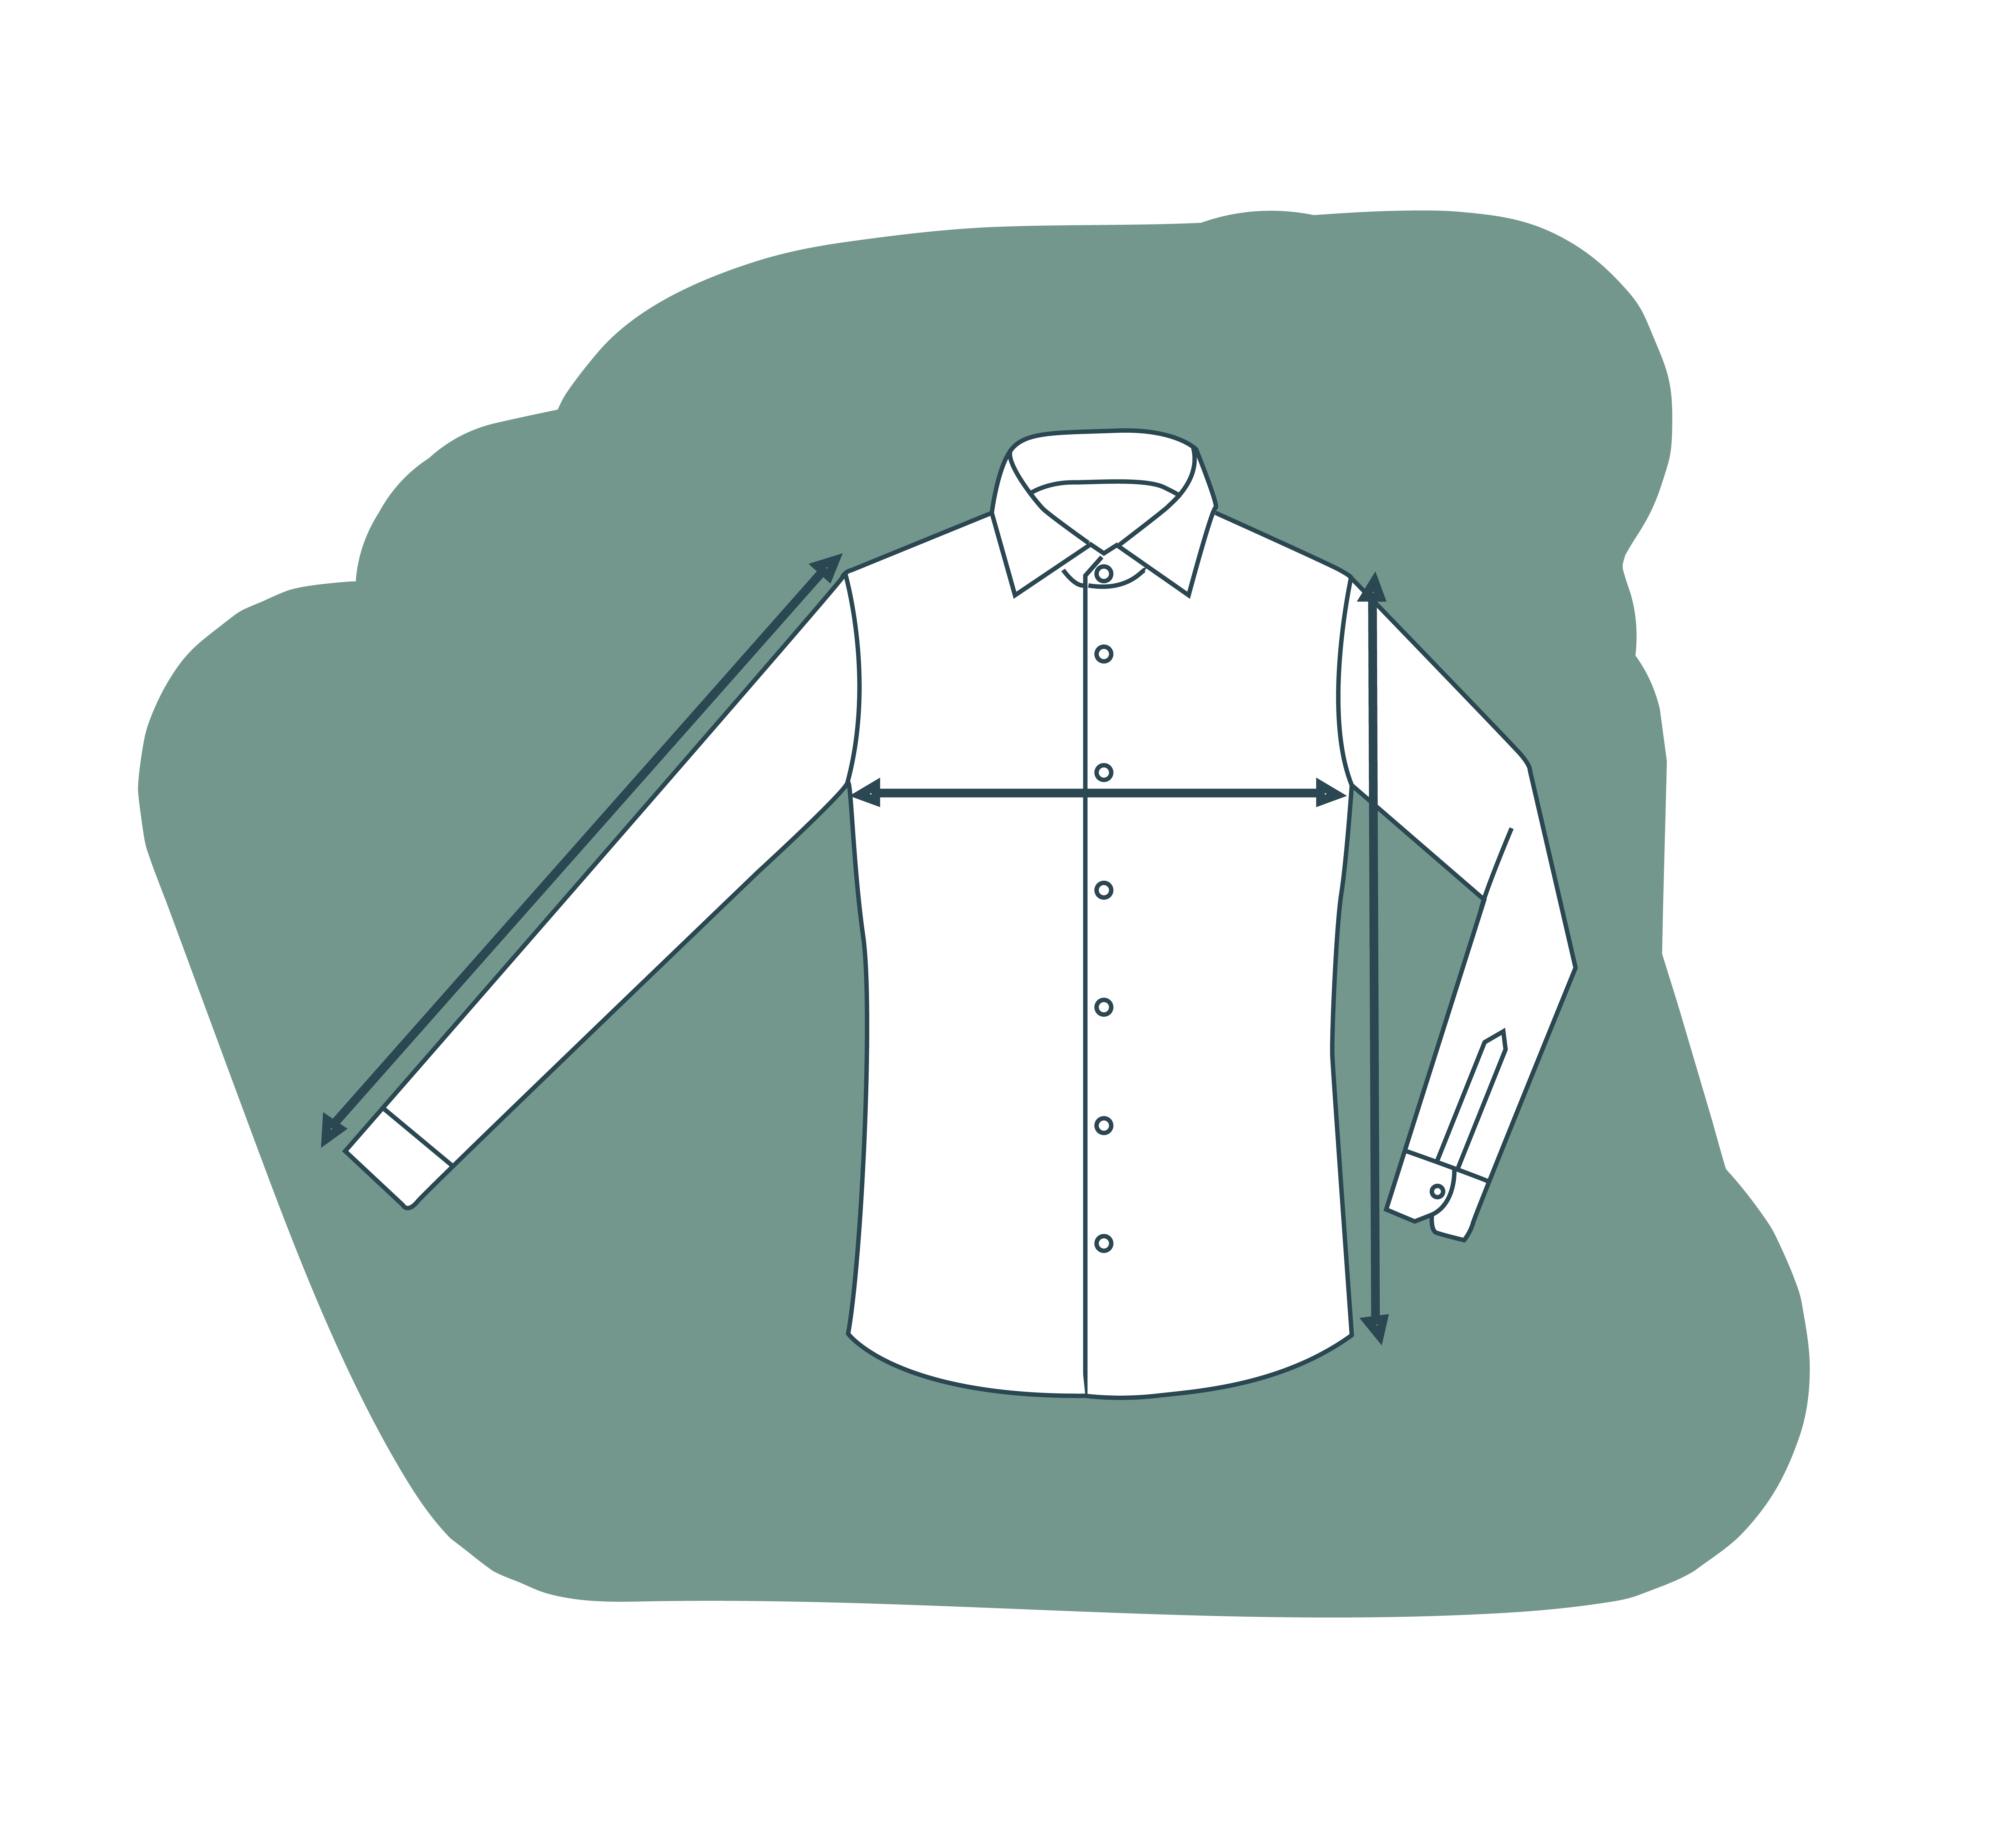
Taking measurements from a garment
If you have garments in your wardrobe that fit like a glove, you can use them as a reference—it is slightly easier than measuring yourself. Lay your garment flat on a table and proceed as follows:
- The chest measurement is determined from the pit-to-pit width.
- The sleeve length, from the shoulder seam to the cuff.
- The total length runs from the top of the armhole to the hem of the shirt.
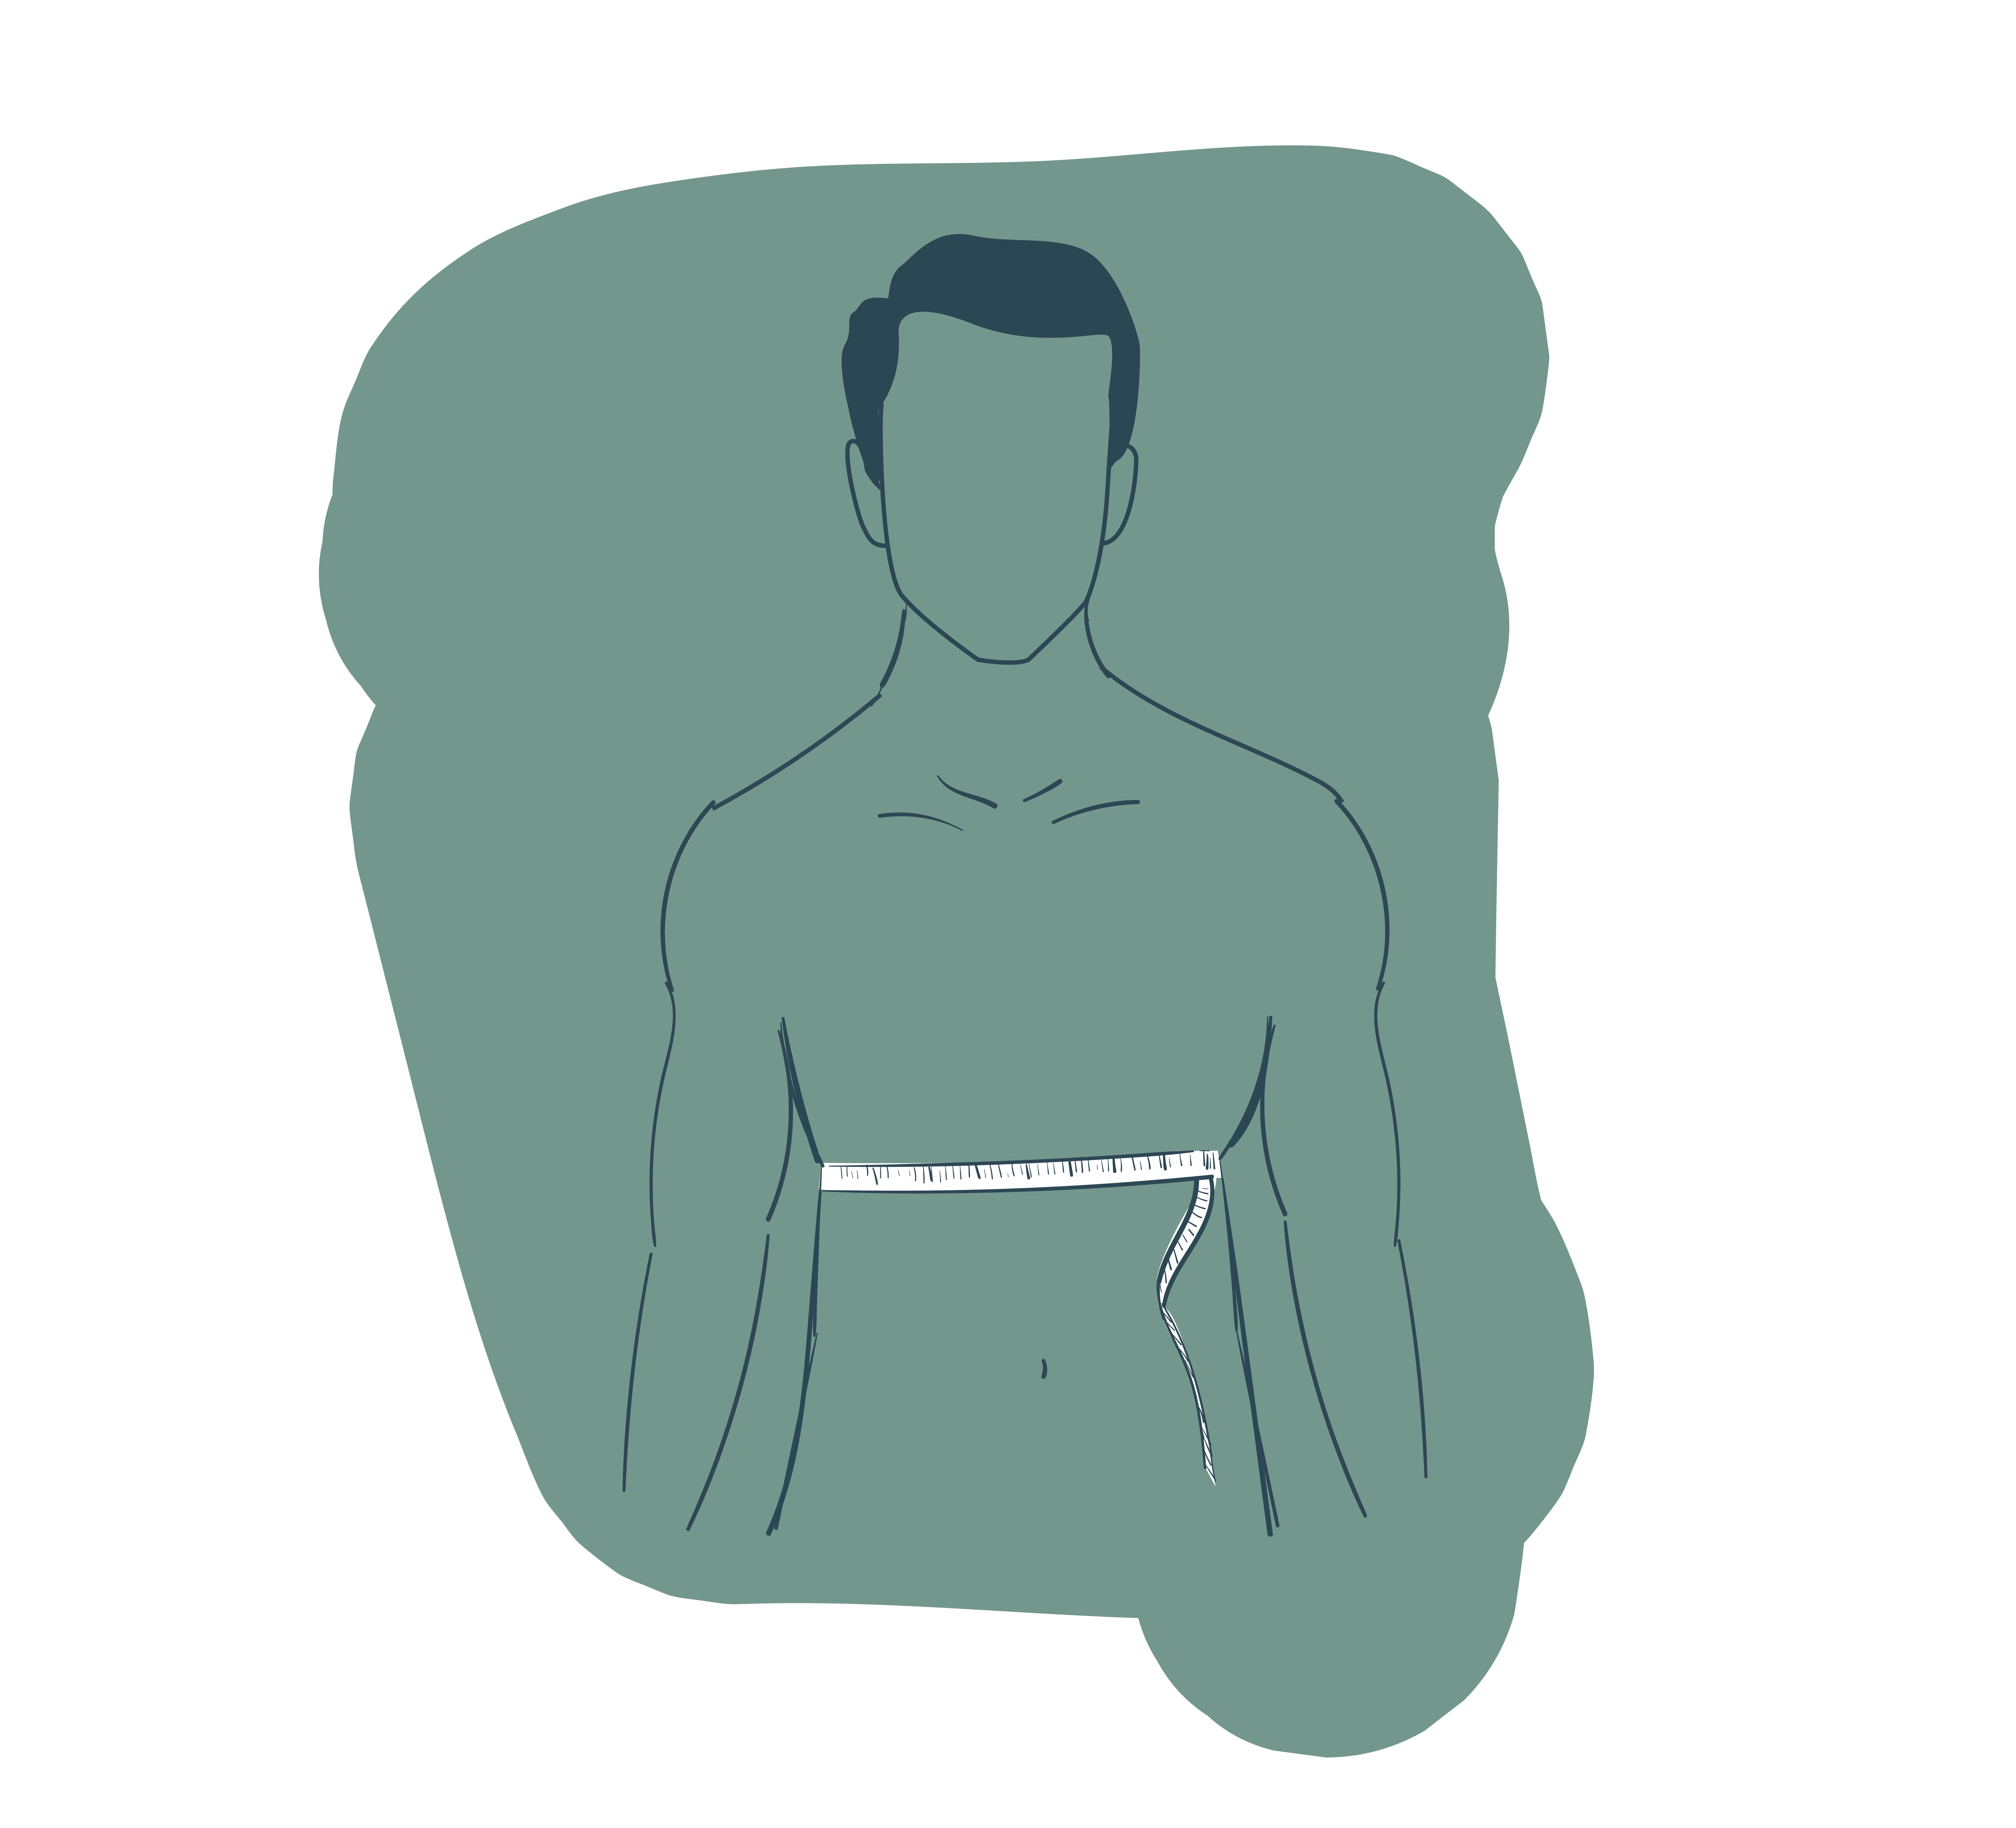
Taking your own measurements
This method requires a little more dexterity and, for ease, a mirror. The ideal solution remains asking someone to help!
- The chest measurement is taken by wrapping a tape measure around the torso, across the fullest part of the chest. It equals twice the pit-to-pit width.
- The sleeve length is measured from the shoulder seam down to the cuff. A useful detail to bear in mind to avoid having to shorten your shirt sleeves.
- The neck size is also measured by wrapping the tape measure around. Simply position it just below the Adam's apple, then add one centimetre to the measurement.


